Thursday, December 18, 2014

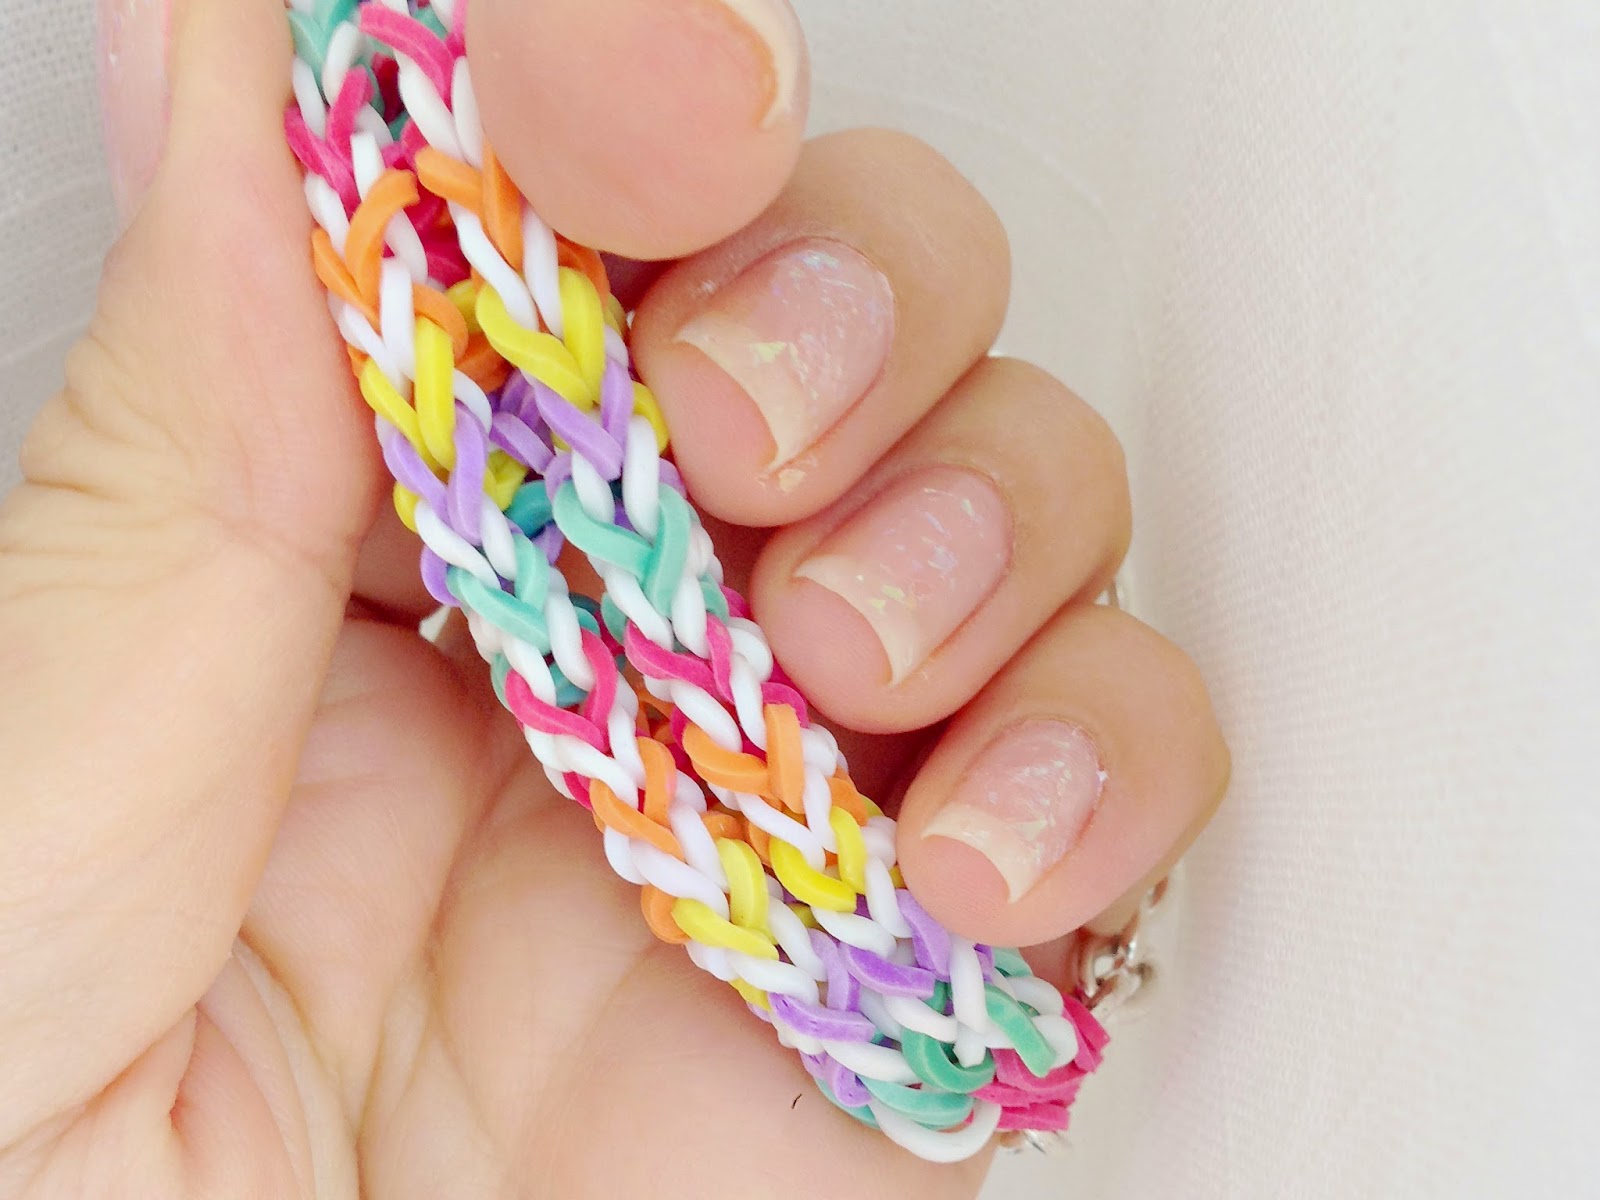
Rainbow Loom No Loom No Hook Two Peg Easy Beginner Tutorials


My poor blog has been neglected as I have been making weekly YouTube videos for Rainbow Loom Bracelets (also known as Loom Bands).  Here is a few of my no loom or loom optional tutorials that I have posted to youtube.  Be sure to check them out.  You can view my channel here, or search for the bracelet name along with Rainbow Loom and the tutorial should show up.

These rubber band bracelets are truly addicting to make.  With techniques similar to crocheting, but less commitment I can see why people of all ages are hooked on this Rainbow Loom (LoomBands, BandaLoom, Crazy Loom, Fun Loom, Wonder Loom) trend.

The tutorials below can be made without a loom.  I use two pencils rubber banded together for most of the tutorials I make.  Hope you enjoy!  If you happen to make any of these bracelets I would love to see it.  Please tag me on instagram, my username is @thecheesethief.

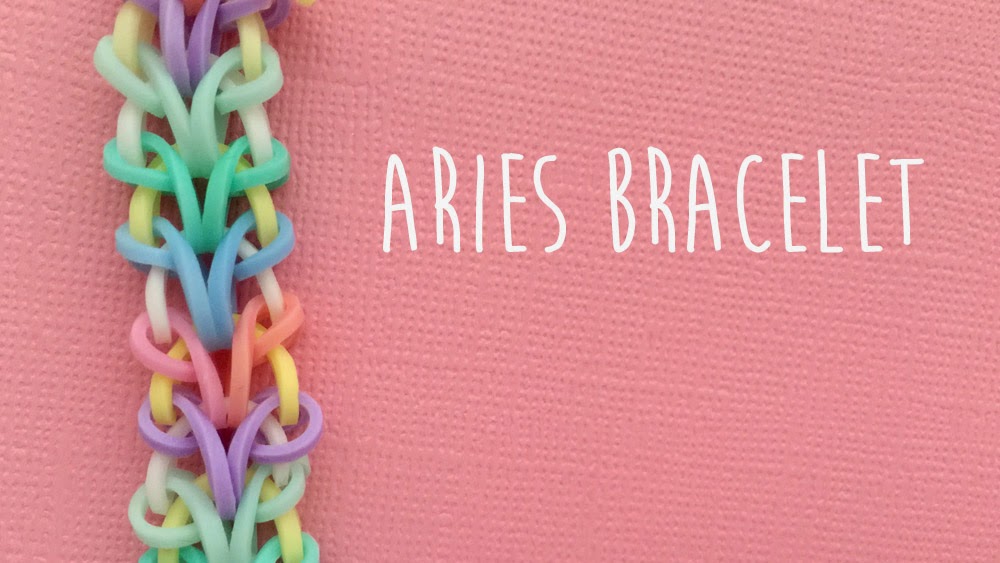
Rainbow Loom Aries Bracelet (No Hook, No Loom) : https://www.youtube.com/watch?v=pzD5q1fNxQo
Rainbow Loom Bands Anais Bracelet Tutorial (No Hook, No Loom): https://www.youtube.com/watch?v=fQTeiJOliwQ
Rainbow Loom Bands Celtic Cross Tutorial(No Hook, No Loom): https://www.youtube.com/watch?v=MHwZ0jvJvmY
Rainbow Loom Bands Chained Hearts (Monster Tail or Rainbow Loom): https://www.youtube.com/watch?v=PJY-T7lvHzw
Crooked Hearts (No Hook, No Loom) Tutorial :https://www.youtube.com/watch?v=n01zbUgCOTI
Crown Royal (No Hook, No Loom) Tutorial : https://www.youtube.com/watch?v=Gb4pHy8JxwE
Half Lorax (No Hook, No Loom): https://www.youtube.com/watch?v=L-d_0IVuv9c
Hot Air Balloon Rainbow Loom Tutorial: https://www.youtube.com/watch?v=LlFfmNbRcaw

My Little Pony Fashion Spa Day with Elsa and Ariel too
https://www.youtube.com/watch?v=2os_1UVecwc

Frozen Fever Fashion Show with Elsa, Anna and Ariel

https://www.youtube.com/watch?v=FGioMsDFPJU

Japanese Eraser Collection with My Little Pony Pinkie Pie

https://www.youtube.com/watch?v=TpaNLkecT54
Friday, November 21, 2014

Ugly Christmas Sweater DIY


I wrote this post as part of a paid campaign with I Love to Create and Blueprint Social. The opinions in this post are my own.

For the past few years I have been invited to a couple of Ugly Sweater Christmas Parties. And each year I am always scrambling to find a sweater. I would go to Goodwill, thinking they should have something, but surprisingly they don't have very many. A worker at Goodwill mentioned that ugly sweater parties were becoming quite popular, so they usually sell out of ugly sweaters fast.  This year I will be prepared.  I was sent a kit of sparkles and glitter to decorate my own ugly sweater. This is how I made my ugly sweater, hopefully it will give you some holiday inspiration.


The materials I used for this ugly sweater were as follows:
1 sweater 
1 old child's onesie (optional)
1 set of red poinsettias
Tulip iron-on transfers
Tulip Glitter Dimensional Fabric Paint
Tulip Fashion Glitter
Tulip Fashion Glitter Bond
Aleene's Tacky Glue

The sweater started off pretty ugly itself.  The yarn was mixed rainbow color.  To ornament it and make it even tackier I decided to put fake pointsettias on the sweater.  I put extra glitter on the poinsettia leaves using Tulip Fashion Glitter and Fashion Glitter bond.
To attach the poinsettias onto the sweater I used the existing wire that was on the flowers, but I also secured it with Aleene's tacky glue (seriously the best glue ever, I use it for everything).
I had an old onesie that I cut up to use the snowmen for the sleeves.
To attach the snowmen I used the Aleenes Fabric Glue and the Glitter Dimensional Fabric Paint to make borders. 
Using the iron on glitter paper I cut out Christmas trees.  To cut a perfect tree you first fold the glitter paper in half and cut a triangle.  Then you cut the indentations of the tree.  

Iron on the trees and viola Ugly Christmas Sweater complete.  The possibilities are just endless with the materials from LoveToCreate.

To see the latest goodies from Tulip, follow them on  out on Facebook, Twitter and Pinterest.


Thursday, November 6, 2014

How to Update Jewelry and Choose Outfits for a Family Photo

This weekend we took family portraits.  Planning outfits for pictures are always tricky, there seems to be so many rules.  I've read no sleeveless, no patterns, don't show too much skin etc.  Some of these rules make sense, some not so much.  I came up with my own guidelines in picking out outfits for family pictures.  

First off do not match the entire family.  You want everyone to coordinate but not match (ie no white turtlenecks and khakis for the entire family).
This photo is from awakardfamilyphotos.com.  The caption reads "the family that caters together stays together".  

Below is one of my favorite pictures for clothing coordination (I also really like the photo pose):
Photo Credit: Laci Davis Photography, from site itsoverflowing.com

To pick outfits here some of my tips.  

Start with a color scheme.  One way to do this is find one outfit that you love and work off of that. For our portraits, I found a blue and maroon ikat dress that I was going to wear. 

Coordinate the other outfits (not match them). For my girls I coordinated with pink dresses with maroon accents, and for the boys I bought blue with khakis.  To tie in the girls and the boys outfit's I made maroon bow ties for the boys.  The key to having a consistent outfit is to have a accessories that tie the outfits together.

Here are the outfits that I picked out for the kids (sorry for the bad picture, I was in a rush to pull everything together).


Notice that the girls outfits coordinate, but are not exactly the same.  The boys outfits are exactly the same because they are twins, but if they were not twins I would have probably mixed up the shirts a little to have more variety in the photos.

Accessorize with matching colors. To pull everything together you can using accessories that match, maybe a scarf, bow tie, necklace headband, jewelry or shoes. My dress had a mixture of maroon and blue.  To tie in the pink of the girls dresses I wanted pink jewelry to coordinate.  I didn't own any jewelry that had touches of pink on it so decided to revamp one of my old necklaces.  

This necklace was purchased off Ebay for only two dollars (new, seller from China).   I liked the color, but decided that I could part with this necklace, so I decided to paint it with nail polish.  NOTE: do not do this with jewelry that you love, it produces decent results for photos, but it is not perfect. Especially if you do not have a steady hand for painting.


I painted the necklace with two coats of polish and a top clear coat to protect and maintain the shine.

A couple of other but not mandatory tips for picking outfits are:

Buy outfits at the same store.  This is not a absolutely necessary, but if you are on a time crunch and don't have time to shop, it's easier to buy all the clothes (at least all the kids clothes) at the same store like Gap, Old Navy, Target, Carters.  These stores usually come out with outfits all in the same color palette and pattern but different cuts and styles, which makes shopping a breeze.

If not shopping at the same store, bring the outfits to the store you will be shopping at.  This will save you time and extra return trips.  You may think that pink is pink, but with store lighting you never know if a dress is the same color as the other one you choose.  It's just easier to bring the clothes you need to match to the store.

I can't wait to show you my final family pictures so you can see how the outfits all tied together!
cc8eeafdc5fad9f04b08ce81b055cf698aab38a3a4734800ab

Saturday, October 25, 2014

My Twins

One thing I wish I did for my two girls is hired a professional photographer for newborn photos. When my oldest daughter was born, I had just purchased an SLR and thought that I could take the pictures myself.  Looking back at the photos, they are no where near professional.  With my twins I decided to hire a newborn photographer. A professional photographer doesn't just have a fancy camera and lots of props and backdrops, they have patience and skill in posing the babies.  I hired Kymberley Day Photography and I couldn't be happier with the results.  She was so patient and skilled in posing the babies.  She took her time on every shot, making sure each pose was perfect, down to the fingers! I loved all the props she had and the care she took into editing each picture.  Our boys peed everywhere but she managed to photoshop all the wet spots out of the photo.  She wasn't even fazed by the mess.

Here are some of my pictures.  They may look effortless but there was a lot of work and care put into getting each and every shot.


Be sure to check out her site if you are looking for newborn photography in the Orange County area. Remember that your babies will only be small for such a short period of time so savor every moment.

Wednesday, October 15, 2014

Twins Halloween Costume DIY

I finally finished the twin's Halloween costume.  It was more work than I thought, maybe because I had to make two of everything.  The effort was well worth it after I got to see them in the costume.  It was so cute on them.

Here they are Tweedle Dee and Tweedle Dum from Alice in Wonderland.  I wanted to make a costume where most of the clothes could be reused and the accessories were cheap.  All in all these two costumes came out to less than 10 dollars each (not including shoes, those were a gift).  Here is how I made the costumes:


Started off with two yellow polo onesies and two pairs of red tights purchased at Kohls.  They were having a sale so both the yellow onesies and the red pants were 15 dollars (for all four!).


To make the white collar I cut an old shirt I had into a rectangle and glued the seams.  This is not the correct way to make a collar, but it was way too much work to a proper collar.  This worked out decently seeing as how they will wear this collar only once.


I fold the collar over and attach to onesie.  The collar measured about 14 inches across and was 3 inches wide.  You can glue or sew the collar onto the existing polo.  I slip stitched the collar onto the shirts because I still wanted to use the shirts later.


The hat was probably the part of the costume I pondered most about.  I didn't know what to make the hat out of and I didn't want to buy any hats as the boys do not like things on their heads.  At first I was going to make a paper mache hat, but that can be messy and a lot of work.  Then one night my daughter took a paper bowl and put it on her head.  I had a eureka moment.  Paper bowls painted red for the hat.

Paint the inside too because you will be able to see the underside.

Flag for top of hats are made of pipe cleaners and construction paper.  The yellow construction paper is reinforced with cardboard.  I did tie a black elastic (like for birthday hats) onto the bowls, but they were not happy when I put the elastic under their chins.  If you had two red beanies that would be a good option.

For the bows, I had and old blue pillowcase that I used for the bow ties.  Here is a video tutorial on how to make a bow tie in less than ten minutes.  In the tutorial I made a small bow tie. If you want to make a large bow tie like the one in this costume, use fabric that is 15 inches by 8 inches.  That will yield you a bow tie that is approximately 7 inches by 3 inches.


Here are my tweedles just dreaming of white rabbits and tea parties.

Tuesday, October 14, 2014

Part One of Twin Costumes Complete. Any Guesses?

I just finished making the bows and flags.  Just a couple more things to paint and cut and their costume will be complete.  Any guesses as to what they might be?


Stay tuned tomorrow for no sew bow tie tutorial as well as the completed costume.

Thursday, October 9, 2014

Frozen Anna Inspired DIY Halloween Costume Tutorial

I can't believe it's almost Halloween.  Time sure flies.  Last year I made my daughter a sushi costume knowing that it would be the last time she would let me pick her costume for Halloween.  This year she has followed in her big sister's footsteps and insisted that she wanted to be a Disney princess for Halloween (Anna from Frozen to be exact).  I decided to try to make her costume instead of buying it. I have to admit it doesn't completely look like Anna, more of a resemblance but she's happy with it and that's all that matters.  Most of the materials I had at home.  The only thing I needed to buy was the blue tulle.


I'm pretty sure Anna wore pink converses around her castle also.
The best tulle to buy for no sew tutus are the ones cut in these spools.  If you are making a bigger tutu you will need two spools.

To cut the tulle fast wrap it around a piece of cardboard that is the length you want the tutu.  Be sure to add an extra inch allowance for the knotting of the tulle.  You will cut one side so the tulle will be twice the length.
Cut one side only, now you can double up the tulle for making the tutu.  
To knot the tulle I use this slip knot technique.  I posted a YouTube video on how to knot this to make a tutu.  Video here.
To make the dress embellishments I used poly satin ribbon (its the cheapie florist ribbon), This ribbon does not fray so it was perfect.  You could also use felt. 
Attach embellishments using fabric glue or a hot glue gun.  I attached embellishments on both sides to make it look a bit more finished.
Tutu is finished.  To make the shirt cut out same embellishments and glue.
I happened to have a maroon poncho that I cut down the center to make it a cape.  The black shirt was embellished with the same poly satin ribbon as the tutu.  Gold ribbon was placed around the waist of the tutu.
One costume down two more to go. I'm making the twins costumes this year too.  So many cute and funny twin costume options to choose from.  Stay tuned for their costume tutorial.

Sunday, September 28, 2014

No Loom Rainbow Loom Tutorial Series

I've been working on my YouTube channel a lot more lately.  If you are subscribed to my channel you will see that I've been uploading videos almost every other day.  My YouTube channel is more catered towards kids toys and crafts, so if you love things like rainbow looms, Play Doh and origami be sure to subscribe.  I'm starting a new series on my channel for Rainbow Loom bracelets without a loom in response to some requests that I've been getting.  Below is a round up of new tutorial videos I posted for bracelets and charms made without a Rainbow Loom.  Remember to subscribe to my YouTube and follow me on Instagram if you want to see my latest tutorials.

These are all great beginner tutorials.  Looming is easy and addicting!

Original Rainbow Loom Round Up Post HERE.


Easy Knotted Fishtail without Loom


Double Inverted Fishtail without loom

Flower or Snowflake Frozen inspired charms (No Loom, No Hooks)

Double Heart No Loom


Lorax Bracelet

Triple Fishtail


My Little Pony Fashion Spa Day with Elsa and Ariel too
https://www.youtube.com/watch?v=2os_1UVecwc

Frozen Fever Fashion Show with Elsa, Anna and Ariel

https://www.youtube.com/watch?v=FGioMsDFPJU

Japanese Eraser Collection with My Little Pony Pinkie Pie

https://www.youtube.com/watch?v=TpaNLkecT54

Pin It button on image hover