Wednesday, December 18, 2013

Easy Caligraphy Envelopes Tutorial (Cheating Method)


I love the look of hand addressed modern calligraphy envelopes.  Unfortunately, I do not have the skills to address my envelopes like this.  I found a easy way to get around this, it is truly a cheating method but works just as well.  I print out a font very lightly on my computer and go over it with an pen.  This works out so beautifully, and it also helps me practice my calligraphy.  The more I keep tracing these letters the more I get use to the strokes.  I feel like i'm in kindergarten practicing my letters. 
Print your envelope in the lights shade of grey that you can see.


Thursday, December 12, 2013

How to Package your Presents for Mailing


This post brought to you by Duck Brand provided by ShurTech Brands, LLC. All opinions are 100% mine.
I'm proud to say that I have gotten 90 percent of my Christmas shopping complete for this year. The buying part was easy, the mailing part I have not gotten around to just yet.  I always think that how you wrap a present is just as important as whats inside the box.  I participated in an advent swap this year (more to come on that later), but I had to mail 12 small presents to another person selected for me randomly.  I wrapped all her presents medticusly as seen below:


For the out side of the box I really wanted to package it it with something nicer than regular packaging tape. This is where EZ Start Printed Packaging Tape was so handy.  It added some holiday cheer to the outside of an ordinary brown box.  At first I was going to use wrapping paper on the box, but I read on the delivery sites that it's not recomended because the paper may fall off.  This tape was a great way to keep the package secure yet make it look nice.  The tape is strong packaging tape with pretty designs on it..
EZ Start® Printed Packaging Tape is available in the following designs Peppermint, Ornaments, Daisy and Paisley.


Duck Brand® are the makers of EZ Start® Printed Packaging Tape.  They are on Twitter @TheDuckBrand
Remember to stop by and follow @TheDuckBrand for tons of inspiration when you do your holiday packing.

I'd love to see how you use EZ Start Printed Packaging Tape.  Be sure to pin your ideas using hashtag #EZstart
Visit Sponsor's Site

Sunday, December 8, 2013

How to Make Modern Dollhouse Furniture Tutorial

I've gotten a few requests on how to make dollhouse furniture.  I know I mentioned that I would post my instructions but to be honest have been delaying it because I didn't take great pictures when I made the furniture for my daughters dollhouse earlier this year.  Sometimes when I make things I just make it up as I go along, so I also don't have the greatest measurements or instructions.  If you are the type of person that needs exact measurements then this tutorial is not for you.  I am simply going to tell you what I did, but not give you exact measurements.  You can tape the pieces together and adjust as necessary.

Acrylic Egg Modern Chair:
Materials:
Plastic Round ornament that opens in half
Plastic champagne cup (you only need to use the bottom of the cup, the cups need to be the ones with the detachable base)

Use only one half of the ornament and hot glue to the base of the champagne glass.  I also took a piece of fabric to make a cushion for the chair.


Modern Arco Lamp (Arched Metal Ball Lamp)
Materials:
20 gauge wire in silver (16 or 18 gauge would work too)
Plastic Silver Ball ornament (I got mine from Target, you want to buy one that is the same scale as your dollhouse)
Hand saw
Drill

Cut ornament as shown above (a little more than 3/4s of the ornament) with a hand saw.  Use caution when cutting ornament it is thicker than you would think. Use a drill and drill a small hole for wire to loop through.  Attach wire on through hole and bend to make a T shape so wire does not fall thought.  Loop wire to other half of ornament (this is your base).  The base will be too light to support the lamp so add weights to the bottom of base.  I hot glued quarters to the  bottom of my base (if you have kids quarters are a choking hazard, so make sure that the quarters are very secure).
Modern Sofa
Materials:
Kids Play Foam Mat (only one square is needed)
Exacto Knife

Cut our 4 pieces from the foam mat. One for the back of the sofa, two side arms and one for the base of the sofa. 
The back and base of the sofa are the same size, arms are also the same size.  For the arms of the sofa I angled it slightly on one side to create a slight recline on the sofa.  Note how the arms of the sofa needs to be longer (width of base plus depth of base).
Tape your sofa together and adjust measurements if necessary.
Cut out another rectangle shape.  This will the the sofa cushion.  Cut out two more smaller shapes for the back pillow cushions.   Glue only the base together. While base is drying take fabric (I used old grey work pants) and wrap the cushions.  I glued them onto the foam with Aleenes Tacky Glue.

 I don't have pictures on how to glue the fabric onto the foam but you want to make sure that any seems will be in a logical place where they won't be seen.  When base is done wrap base with fabric.  Base is trickier to wrap because you will see more seams.  I made bias strips with the fabric to cover the seams.  For the legs of the sofa glued small wooden pieces to the bottom of the sofa.  Again if this is for small children I would skip this step as it could be a choking hazard.
Pouf was crocheted and rug was a piece of fur that I cut to shape. Semi circle chairs are made of foam and cardboard also.  Will try to post tutorial on that when I have a chance.

Wednesday, December 4, 2013

How to Water Marble Nails and Christmas Ornaments

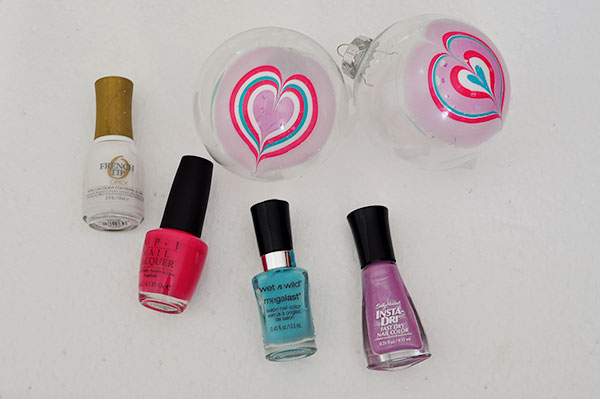
I had so much fun water marbling Christmas ornaments last year, I decided to do it again this year.  This time around I made a heart pattern and used a variety of colors.  I love this craft because it uses everything I already have at home, and its cheap, if I mess up I can simply use nail polish remover and remove the pattern.

Video tutorial found here.
I used Orly French White, OPI Party in My Cabana, Wet n Wild I Need a Refresh Mint, and  Sally Hansen Lovely Lilac.

You can use a clear ornament or an opaque one.  I like the clear ones because you can see the design through different angles.

I water marbled my mails also.  You can also see that tutorial in the videos below.  


Video tutorial for water marbled ornament heart here.

Please check out my other tutorials for fun Christmas ideas:
Salt Dough Gift Tags
Book Page Star Ornament

Kleenex Box Ornament

Monday, December 2, 2013

Holiday Cookies

This post brought to you by Walmart. All opinions are 100% mine.
Making Holiday Cookies with my daughter has become a tradition in our house.  The best part about cookie making for us is not eating them, but we love to decorate them and give them out.  The smell of holiday cookies in our house really sets the stage for the wonderful holiday season ahead.
Did you know that Walmart on their website links inspire and assist with the holiday baking and entertaining? The site includes fun festive cookie recipes, coffee preparation tips, and great deals on the brands you need for your best baking. To help prepare for holiday entertaining and gifting there are even how-to videos to guide you through the holidays with ease. Also, Walmart carries trusted, quality brands such as Smucker’s®, Jif®, Pillsbury®, Eagle Brand®, Crisco®, Hungry Jack® and Folgers® so you know you are using the best ingredients. Whether you are creating a traditional favorite cookie, or trying something brand new, this site has helpful tips for you.
This year we made gingerbread cookies.  My daughters were so excited about this.  They were so excited to decorate the gingerbread men and put faces on them.  They aren't the prettiest cookies, but I the people we give them to know that they were made with love.


Sunday, December 1, 2013

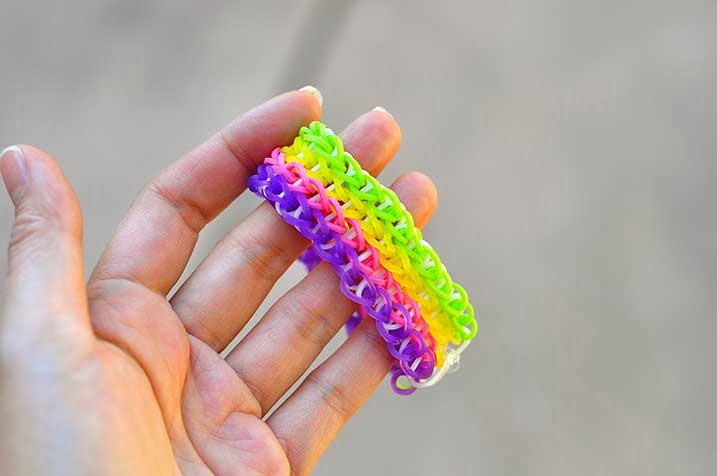
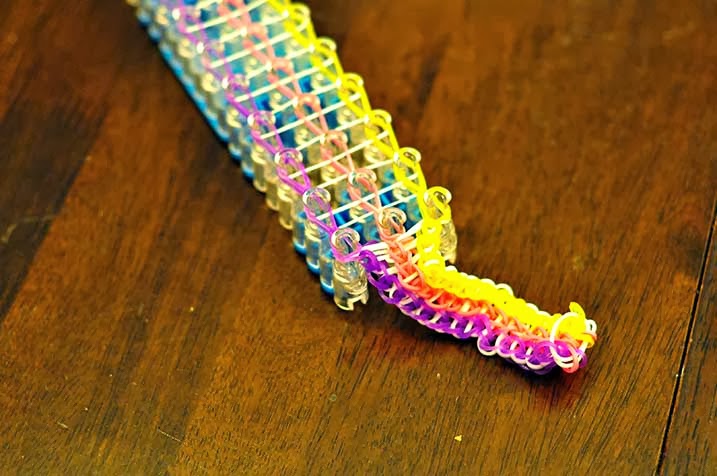
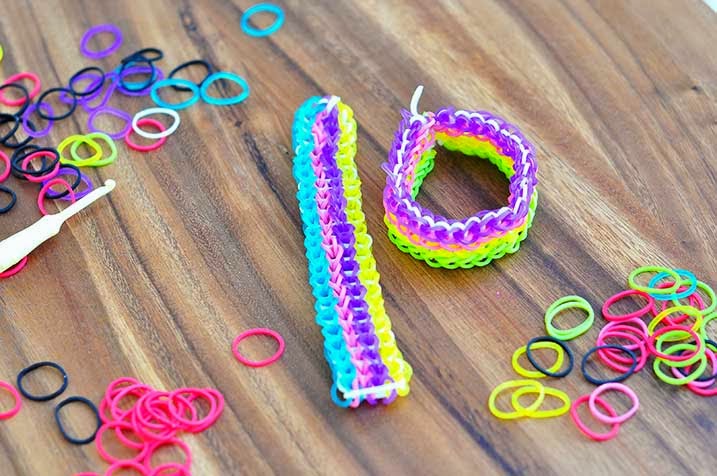
New Rainbow Loom Pattern Tutorial: Inverted Fishtail and Double Inverted Fishtail Bracelet

Here are two new Rainbow Loom patterns with video tutorials.  I didn't realize that my videos were not viewable via mobile devices so I've included a link to each video instead of embedding the video into the post.

The inverted fishtail and the double inverted fishtail can be both made without a rainbow loom.  The double inverted fishtail is a bit easier on a loom, but still doable without a loom.  I've been making so many bracelets I've run out of rubber bands.  I ran to Target during lunch to pick up some (read on a forum that Target had them at the dollar spot), but when I got there there was only one open pack left.  So if you are in the market for rubber bands try Target's dollar spot, maybe yours will have it.  I think the pack was 300, but I didn't buy it because half the rubber bands in that last pack were scattered in the bin.

I was actually looking to buy these gold rubber bands on Amazon.  They seem really cool to make bracelets out of.  I usually get my online craft supplies from Consumer Crafts (their rubber bands are pretty cheap only a dollar some for 300 rubber bands), but they don't have the gold ones.  There are some cool glitter ones and glow in the dark ones that I ordered.  Their Rainbow Loom is relatively cheap too, compared to Michaels.  

I heard that the Rainbow Loom is flying off the shelves and on the top of every child's Christmas list (both boys and girls).  Yes, this was completely surprising to me that boys are into this also.  I love this loom for kids because it stimulates the brain thinking of new patterns.  It also is so much better than sitting in front of the TV or computer. 

Inverted Fishtail Rainbow Loom Bracelet.


Double Inverted Fishtail Rainbow Loom Bracelet

Here is the video on how to make a Inverted Rainbow Loom Bracelet (I show you how to do it without a loom): https://www.youtube.com/watch?v=Jv7mg3RrfeA
Here is the double inverted fishtail bracelet video tutorial: http://www.youtube.com/watch?v=_lyoK1K8tYg


disney princess toy video

Wednesday, November 27, 2013

Christmas Decorations are Up!


Decorating the tree this year was extremely fun this year, but hectic at the same time.  Before I had kids I was very particular about how the ornaments on the tree looked.  Our tree had to look like a department store tree.  I always made it a point to only ornaments that matched our blue and silver color scheme.   I would plan out the placing of the ornaments so they are equally yet randomly distributed through the tree to give it an effortless look. Now with Avery and Lex our tree has become a mod podge of different ornaments the bulk of which placed at the bottom part of the tree (where the kids can place them).   Our tree has ornaments made by Avery as well as ones she picked out from the store.  Macaroni frames, cotton ball snowmen, glittered salt dough ornaments now adorn the tree.  I have to admit I like out tree better now.  I loved pulling out each of these "custom made" ornaments (that now have memories tied to them) out of the box.  

I created a timelapse video below to show you our decoration process.  It was so great having Avery decorate the tree and now worrying that it wasn't "perfect."  Lex was still too young for the process and just wanted to eat all the ornaments on the tree (not just the macaroni ornament).  Video here: https://www.youtube.com/watch?v=0C6NwLSmZns or below.  


Citi Tuesdays

This post brought to you by Walmart. All opinions are 100% mine.
The holiday season is officially here.  If you love the holidays, but want to still be mindful of your pocket book here is a great promotion.  Use your Citi® credit card on Citi Tuesdays on an eligible purchase of $100 or more while shopping on Walmart.com this holiday season, and receive a free $10 Walmart eGift Card.  This is online only, remember to make your purchases online.  I know I do most of my holiday shopping online nowadays.  It's so much nicer to be in the comforts of your own home and not have to deal with the crowds and the parking.
Citi® consumers that spend $100 or more on an eligible purchase on Walmart.com will receive a Walmart eGift card emailed to them weekly. The gift card will be emailed within 10 days after a qualifying Citi® credit card purchase occurs.
Who doesn't want an additional 10 dollars to shop with?
I shared on my instagram a cool knitting machine that I would love to buy for someone (possibly for myself). There were lots of really cool toys for crafty kids at Walmart.  The knitting machine was just one of many toys that I saw.  I love their selection of crafty toys for kids and the crafty adult. What are some things that you would spend the extra 10 dollars on?
The Nitty Gritty:
Terms and conditions:
To qualify for this offer, you must make a single-receipt purchase on Walmart.com of $100 or more (excluding taxes and shipping charges), by 11:59PM PT on Tuesdays, between 11/5/13 and 12/17/13, and pay for your purchase using an eligible Citi® credit card. Purchase may not include gift cards, Pharmacy, tires, Photo, customized or personalized items, Vudu, or Walmart To Go. Not valid on prior purchases or cancelled orders, and offer may not be combined with other offers or promotions. Applies to online purchases only. All Citi Branded consumer credit Cards, excluding business credit and professional cards, are eligible for the promotion; business credit cards and professional cards are not eligible. Limit one gift card per Citi® credit card, per Tuesday, per purchase of $100 or more. If a qualifying purchase is made, a Walmart eGift Card in the amount of $10.00 will be emailed within ten days of the qualifying purchase to the email address provided. A valid email address must be supplied at time of purchase to obtain a Walmart eGift Card. Use of the Walmart eGift Card is subject to the Walmart Gift Card Terms and Conditions, available on Walmart.com (at http://help.walmart.com/app/an…. Offer valid in the 50 United States only. Offer valid until 12/17/13. However, this offer is subject to modification or termination without notice

Friday, November 22, 2013

Rainbow Loom Bow (One loom)

Here is another original Rainbow Loom pattern.   It uses the quadruple single for each side of the bow.  I have been making lots of bows lately because my daughter is very into Minnie Mouse.  On the Mickey Mouse Club House they have a special small segment called "Minnie's Bowtique."  It's super girly and probably why Avery loves it so much.  I knew that if I made this bracelet she would love it.

To make the bracelet you make two separate quadruple single sides using five pegs.  Attach the two in the middle.  I created a video tutorial below so you can see how it's done.  It's not a beginners tutorial, but fairly simple.   To attach the bow to a bracelet I loop the horizontal rubber band ends to a inverted fishtail bracelet. This all makes more sense in the video tutorial here: (https://www.youtube.com/watch?v=ZPP9pZQeTVw)


The black and pink bracelet is a fishtail bracelet that I made with no loom.  The bow is attached to an inverted fishtail bracelet.


These would make really cute hair bands or if you made a long one a head band.  

Saturday, November 16, 2013

More Rainbow Loom Patterns and Designs Tutorials

I really love this Rainbow Loom.  I've been thinking up new patterns and just knocking the bracelets out for Avery.  There's something therapeutic about crafting, just focusing on making something so simple just invigorates me and relaxes me at the same time.  Once I get into a rythm I can just keep looming.  Making these bracelets is like knitting.  I've used my knitting loom to make a few knit gifts, and rubber band looming uses similar techniques.  It's a lot nicer than knitting because a project takes less than 20 minutes to complete.  The rubber bands are relatively inexpensive and you can even make patterns without a loom.  I have a few video tutorials on how to make bracelets, rings, belts, headbands (whatever you want) with just your fingers.  For more complex patterns you can make your own loom just using four pencils, a matchbox and rubber bands.

I've thought of some new unique patterns and created video tutorials below.  I hope you enjoy them.
Double sided bracelet, one side is red and black, the other side is rainbow.

Pattern for making this bracelet, but watch the video tutorial that is below.

Some closeups of the bracelets.
Here is the video tutorial on how to make this double sided bracelet.  If you want to extend the bracelet longer with only one loom please see my other tutorial here.


Friday, November 15, 2013

Rainbow Loom Bracelets For Adults (And A Tutorial On How To Make A Bracelet Without A Loom)

So you may be wondering if I'm sporting any of these elastic band bracelets that I'm making.  I mentioned in a previous post that I am way too old to be wearing these rubber band bracelets.  While that still holds true for some of the designs, there are a few ways I have made these bracelets so that they are stylish for any age.  Instead of finishing the bracelets with the plastic C clasps, I decided to use a silver link bracelet.  This gives the bracelet a nice finished look.  I actually love to wear this fishtail bracelet now, it actually looks like a bracelet that I would purchase.

I also made this bracelet without a Rainbow Loom.  I just used my fingers to make it!  Included below is a video tutorial on how to make a Rainbow Loom bracelet without a loom.  I have more videos coming of new complex bracelets without a loom, so be on the look out for those.

These colorful rubber bands as well as a Rainbow Loom can be found online on Amazon.com or ConsumerCrafts.com.

Here is the video tutorial on how to make a Rainbow Loom bracelet with no loom.  The pattern it shows you is the fishtail bracelet as seen above.  All you need is rubber bands and your fingers!  So this is great if you are going somewhere and don't want to bring your loom or if you do not have a Rainbow Loom. Video tutorial here: https://www.youtube.com/watch?v=RO9octNkRD0


Fishtail elastic band bracelet made without a loom.

Instead of putting a C clip just use a bracelet and loop it through both ends of the fishtail and clasp the bracelet .  You want to make your fishtail bracelet half the length of your wrist.

Here is how the bracelet looks on


Thursday, November 14, 2013

How To Make Pretty Puffy Bows And A Giveaway!

This post is brought to you by Bowdabra.  All opinions are 100% mine.

I can't believe malls and stores are putting up Christmas decorations already. It does seem a bit early but I actually don't mind.  I love the holiday season and all the holiday decorations just get me excited for the holiday festivities that are to come.  When I see the holiday decorations at the stores I always am amazed at all the pretty bows that adorn the wreaths, Christmas Trees and presents.  I have always wanted to have those big puffy bows for my wreaths and presents but never knew how to make them.  This year I'm happy to say that my presents and Chirstmas decor are all going to be adorned with beautiful bows.  I received a Bowdabra and am amazed at how easy it is to make these bows.  

I'm going to show you how to use these bows and a little bit of burlap to create simple elegant rustic looking wrapping.  All you need is wired ribbon, bow wire, Bowdabra, burlap and craft paper.


Take 16 inches of bow wire folded in half and place in the horizontal slot of the Bowdabra. Next take your wire ribbon and place in vertical slot.

There is a handy chart in the Bowdabra manual on how long to make each loop depending on the thickness of your ribbon.  I find that making smaller loops helps in making prettier bows.  

Fold ribbon back and forth onto the center slot of the Bowdabra.  Be sure to keep your loops even.  This is very important to make a uniform bow.  The manual also lets you know how many loops to create.  For my 1.5 inch wire ribbon bow my loops are about 7 inches and I looped around 9 times.  The more loops the better, so I added one to the recommended amount.

When all the loops are done, loop through the bow wire like image above (I know this is different ribbon, I didn't have a focused picture of the other ribbon).

Remove bow from Bowdabra and start to fluff.  I start turning the ribbon right sides out here.  In the instructions it tells you to turn it as you are placing it on the Bowdabra, but I find that turning the ribbon here works way better,

Fluff the ribbon into a half sphere shape.  I like to do three of four loops on the top, and then work the side ones in a circle.

This is the view from the side of the ribbon.

Use craft paper and wrap the gift, then cut a piece of burlap to place around the box.  I then attached the bow wire around the burlap.  The blue bow above was also made with the bowdabra.  That one is a simple bow which works better with satin ribbon.  The large poofy bows work better with wire ribbon (something that they don't tell you in the manual).
Be sure to visit Bowdabra on Facebook and Twitter.  Or to see some video tutorials visit their YouTube channel.  Bowdabras and accessories are available at most craft retailers, such as Jo-Ann Fabric and Craft Stores, Michaels, AC Moore.

And now for the giveaway. One lucky reader will win a Bowdabra prize pack of their own.  Just enter through the Raffelcopter below.  a Rafflecopter giveaway

Friday, November 8, 2013

PRK Laser Eye Surgery Today (My entire PRK recovrery experience)

I'm getting PRK eye surgery to correct my vision today so I won't be writing any craft posts for the next week.  This is my second PRK surgery to correct my nearsightedness.  In my first surgery about three years ago I was undercorrected in one eye so this "touch up" surgery will correct just my right eye.  They say "touch up" to make it sound better, but its basically the same surgery with the same risks and pain. People ask what the difference is between PRK and Lasik.  Lasik they cut a flap where with PRK they remove the top most layer of skin from your eye and then laser.  PRK is far more painful than Lasik because its like having an open scab in your eye that needs to heal.  I got PRK because my corneas are too thin to get Lasik.

My first surgery was very painful, I say it was worse than childbirth (but I had an epidural).  It took me a long time to heal from PRK (about a week and a half).  This surgery hopefully I will heal faster, the first time the doctor prescribed me an eyedrop that I was allergic to so it slowed down my healing process. While I was healing I was constantly googling PRK experiences to see if mine was normal.  The most helpful were blog posts where people detailed their experiences.  So for the next few days I will detail my PRK experience. Hopefully it will help someone who has gotten the surgery or is thinking about getting the surgery. I'm not sure how well I could type or see the computer monitor this second time, since I am only getting one eye done.  The first time I got it with both eyes it would have been impossible for me to type.

Surgery is in an hour!  Gotta get ready.  Will post again when I can.

Three years ago my prescription was about -5.25 and -5.75 and I had some astigmatism.  I don't really remember what the exact numbers are but my vision was pretty bad.  After my first surgery my vision was 20/40 on one eye and 20/80 in the other.  I decided not to recorrect the 20/40 eye because the surgery is so painful and because my doctor said that as I go older the 20/40 eye will be good for reading.

Update Friday 11/8/2013 10AM
Back from surgery.  Doing one eye is definitely better than doing two.  I can type and see.  Pain level from 1-10 is 2.  Procedure was worse second time around.  I had major anxiety, especially when he was scraping off the skin on my eyeball.  It did not help when he said the skin was thicker this time around and needed a special tool.  Took some tylenol PM and going to rest now.  Next appointment is tomorrow morning.  I can see pretty well because of my left eye.  My right eye (surgery eye) is completely blurry.

Update Friday 11/8/2013 3 PM
Woke up from my nap and really feel no pain.  Eyes feel really dry.  Before I fell asleep at 10AM my eyes were really in pain.  A sharp stinging sensation like chili peppers were poured onto my eyes.  It lasted for a few minutes before I fell asleep.  I can see far but it is blurry.  Since I did only one eye I walk around and do daily activities ok.  If I did both eyes I would not be able to do anything.

Update Friday  11/8/2013 6 PM
No real change from a few hours ago.  I slept again probably because of the Tylenol PM.  I'm droping Refresh preservative free drops and an antibiotic every 4 hours.  Before my surgery I was on Lotemax  and Restasis (for dry eye).  Eyes don't feel dry and there is only very slight pain.  This PRK experience is definitely better than the first.  If I cover my non surgery eye I cannot see the computer monitor to type, but I can see the tv.

Update Saturday 11/9/2013 8 AM
Seeing the doctor again today.  I've been taking tylenol for the pain.  Last night the pain came back and my eye is more red than before.  I can see the alarm clock, but its blurry.  I think my vision for my surgery eye is now about 20/60.  I need to print out an eye chart that I used last time to check my vision.  I can't seem to find it again.

Update Saturday 11/9/2013 11 AM
Just got back from the doctor.  He said my eye is healing fast, a lot faster than my previous surgery.  The first surgery my eyedrop allergy really slowed down my healing time.  8 mm of skin was taken off for my surgery and I'm at 5mm left to heal.  He said hopefully I can take off my band aid contact lens by Monday or Tuesday.  My vision is about 20/60 right now.  I'm still on the antibiotic drops and Tylenol.  The Tylenol really helps with the pain.  Computer monitor is still very blurry (if I cover my left eye), I would not be able to go back to work at this point.

Here is the free eye chart that I use:http://www.i-see.org/etdrs/etdrs-r.pdf  I print it out (no resize) and mark off 20 feet away.  If I can see the 20ft line that means my vision is 20/20, 40 ft line means vision is 20/40.

Update Sunday 11/10/2013 9 AM (2 days post surgery)
My eye is super sensitive to light.  I feel like my vision is worse and it feels like there is sand in my eyes.  Last night I used lots of numbing drops which slow down healing.  I have to sit in a dark room in order to be comfortable.  This is very similar to my first surgery experience.  I sat in a dark room for three days straight.

Update Monday 11/11/2013 9 AM (3 days post surgery)
My eye feels blurrier than yesterday but the sensitivity to light is gone.  I'm 20/60 to 20/80 right now.  I remember the doctor saying that this is normal because as the skin heals towards the middle my vision will start getting worse because the skin is coming together towards the center.  I would not be able to drive or type if I had both eyes done.  I can can see the text on my iphone with my right (surgery) eye now, but I do feel like I am straining it when I look.  Computer monitor is still very blurry. I have another appointment later today, hopefully the contact lens can come off.

Update Monday 11/11/2013 9 PM (3 days post surgery)
Went to the doctor earlier and they took off my contact lens.  They used these really pointy tweezers that were so scary looking.  My vision is about 20/50 and I can barely make out the computer screen.  No pain, but I'm hoping my vision improves tomorrow.

Update Tuesday 11/12/2013 3 PM (4 days post surgery)
My eye felt like there was a grain of sand in it for most of the day (probably because the contact lens was removed).  Not much new, far vision is still blurry, computer monitor is still not readable.

Update Wednesday 11/13/2013 4 PM (5 days post surgery)
My recovery is coming along.  I can barely see the computer monitor with my right eye.  But because I only got surgery in one eye I am able to function and work.  I work in front of the computer all day so today was my first day back at work.  I worked from home, as I do not know how well I can drive yet.  I still do not see 20/20 with my right eye and it has me rather nervous.  The first time I got PRK I was not able to see 20/20 and never ended up ever reaching 20/20.  I am still hopeful that I will see 20/20 and that I have a bit more healing to do.

Update Thursday 11/14/2013 9 PM (6 days post surgery)
I can see pretty well for things at a distance, still not 20/20, but better than before surgery. Relative to my left eye, I think my right eye is now equal if not better.  I'm guessing my vision is now 20/40 but not very crisp.   My upclose vision for my right eye is still pretty blurry.  I can see the computer monitor but not very well.  If I had done both eyes I do not think I would be able to work in front of a computer (unless I changed the resolution so the fonts are huge).  No more pain, hopefully I'll reach 20/20 soon.

Update Friday 11/15/2013 9 PM (One week after surgery)
Vision fluctuates.  My eyes don't feel dry but doctor advised that I should use artificial tears every few hours. Not much new, my vision was tested today and its 20/30 for my right surgery eye.  My upclose vision is still blurry but I guess my eye is still healing (this is a good sign because I figure if I was completely healed and my vision is 20/30 it would be disappointing.  Things around me do not seem sharp or crisp, but I am able to see and drive.  Doctor says that it takes about 6 weeks to get to 20/20.  With my previous surgery my vision was basically the same after the 10th day.  So if you are reading this and your vision is 20/80 and you are already two weeks into healing, I would say that for me there was only slight improvements in vision after the 10 day mark.

Update Sunday 11/17/2013 9 PM (8 days post surgery)
My vision has been improving slightly.  I am now able to drive, but street signs are not sharp and sometimes not completely clear.  I haven't driven at night but have been in the car and I see small halos, but nothing that major.  I'm not really sure if the halos are because the lights are just a bit blurry.  Eyes do not feel that dry and overall I am back to normal.  I will continue to update this post weekly/monthly depending on if I have any major changes.

Update Saturday 11/30/2013 (3 weeks post surgery)
I don't know if my vision is 20/20.  Things are much clearer.  I can drive without glasses at night.  A few nights ago I woke up with a sharp pain in my eye.  It felt as though the skin had ripped off my eye (like right after the PRK surgery).  My eyes were dry so I put rewetting drops in and tried to go back to bed.  The pain lasted for about 15 min and I fell asleep.  In the morning my eye was fine.  Now I put drops in right before bed to prevent that.


Friday, November 1, 2013

How to Extend a Rainbow Loom Bracelet With Just One Loom Tutorial

I just received my Twistz Bandz Rainbow Loom in the mail and am so excited.  For those of you who don't know what a Rainbow Loom Bracelet is, it's basically today's version the lanyard bracelet.   The loom comes with tiny rubber bands that you put on in patterns and use something that looks like a crochet needle to hook together. Depending on how you place and hook the rubber bands, you could get some pretty intricate patterns.  I made a few of these rubber band bracelets for my niece and daughter.  I am probably too old to be sporting these bracelets, but it doesn't stop me from making a bazillion of them.  I love all things craft and this is no exception.  When I'm making these bracelets it totally brings me back to when I was a kid and trying to think of new friendship bracelet and lanyard patterns.

For this Rainbow Loom bracelet I figured out how to connect two bracelets together to make one long and wide continuous bracelet with just one loom.  Usually you would have to buy two looms and connect them together to make a long bracelet, but in the video tutorial below I will show you how to connect two bracelets together to make one seamless bracelet.  The other alternative that I've seen is to create a small extension and add it to the end, but it doesn't really look that great.  This tutorial will show a better way of making a long rubber band rainbow loom bracelet. The beginning of the tutorial is a beginners tutorial for making a simple triple single loom bracelet.  When I start connecting the bracelet it does require a little experience making bracelets (experience meaning you've made one or two).  I will also have a follow up video tutorial on how to make a quadruple single loom bracelet, which you could also extend to a quintuple single Rainbow loom bracelet.

Rainbow looms can be purchased at ConsumerCrafts.com and Amazon.com.  There are also other brands of rubber band looms such as FunLoom, Bandaloom and Cra-z-Loom.  They are all basically the same concept (not sure hot the patent works for it!)


Pin It button on image hover